이제 리액트의 핵심기능 중 하나인 createElement를 구현해보자.
코드를 먼저보자!
const TinyReact = (() => {
  const createElement = (type, attrs = {}, ...children) => {
    // 최하위 자식부터 돌 수 있도록 child를 재귀로 구현해야함.

    const childElements = [];
    children.forEach((child) => {
      if (child !== null && child instanceof Object) {
        childElements.push(child);
      } else {
        if (typeof child !== "boolean") {
          childElements.push(createElement("text", { textContent: child }));
        }
      }
    });

    return {
      type,
      children: childElements,
      props: Object.assign({ children: childElements }, attrs),
    };
  };

  return {
    createElement,
  };
})();
기본적으로 createElement는 재귀적으로 호출하여, 가장 하위의 자식이 먼저 호출되도록 한다.
그리고 null이 아니고 원시타입이 아니면 child객체 그대로 childElement로 취급하며,
그 외의 경우는 boolean값이 아니면 text 값이라고 판단하고 text element를 element로 넣어준다.
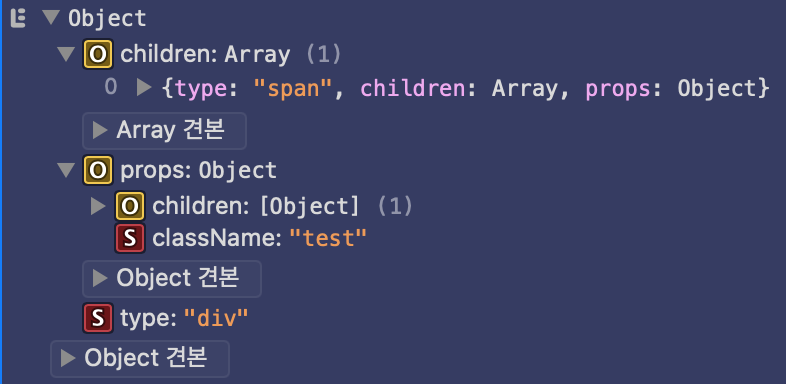
index.js를 바꾸지 않았다면 아래와 같은 결과값이 보여질 것이다.
커밋: github.com/zereight/Tiny-React/commit/fbe18e66f748594c3e19031168e8f5bbd51eb444
'개발 > Web Programming' 카테고리의 다른 글
| js로된 React 코드를 ts로 마이그레이션 하면서 느낀점 (0) | 2021.05.16 |
|---|---|
| [TS] Require stack: - /node_modules/tsc-watch/lib/tsc-watch.js /node_modules/tsc-watch/index.js 에러 (0) | 2021.05.14 |
| 나만의 리액트 만들어보기 - 2 (JSX 셋팅) (0) | 2021.05.04 |
| 나만의 리액트 만들어보기 - 1 (초기 환경 셋팅) (0) | 2021.05.04 |
| CRA에서 env 환경변수 사용하기 (0) | 2021.05.01 |
